Google love adding extra features to their products, hoping it will improve the experience. Unfortunately, it can backfire, and that seems to be the case with Chrome notifications.
If you are a user of the Google Chrome web browser on a PC or Mac, then you have likely experienced what I am about to explain.
(Not sure if you use Chrome? Look at the picture above. It is the icon you will click if you use it to view websites)
Where do Chrome notifications come from?
Chrome notifications initially start when a website asks for your permission to ‘Show notifications’. This appears near the address bar at the top of Chrome.
Here is Facebook doing precisely that:

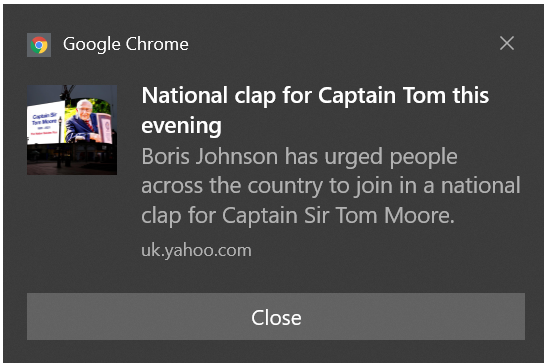
If you choose Allow, you will start to receive notifications. In Windows 10, they will look like the example below, or something similar on other operating systems:

A scam?
According to a report by the anti-virus company Kaspersky, browser notification scams tripled in 2019.
Allowing these type of notifications could end up with you getting unwanted ads, scam sites and even malware.
One of the most common Chrome notification scams I have seen is an advert for Norton Security. It tells you that your subscription has expired and you need to renew. If you click on the notification and follow it through, you will buy a genuine Norton subscription. This isn’t necessarily a bad thing, but the notice was a lie and – whether you already subscribe to Norton or not – they conned you into buying this one.
You will also have given the crooks a cut of the subscription money. And, remember, this isn’t Norton’s fault: it is foot-in-the-door selling by a third party through a scam Chrome notification.
So how do I stop these Chrome notifications?
The first thing to do is keep an eye out for the boxes asking you to show notifications. If you get one, it’s best to click on Block. Unless you are sure you really want them, I would recommend this for anything that comes up. I haven’t found one Chrome notification that I believe useful, so please Allow with care.

If you are already receiving notifications you don’t want, you can prevent them within the settings of Chrome. Unfortunately, Google has hidden those settings deep within its browser.
So, here’s how to get to them and what to do:
- Open your Chrome Browser
- In the top right, click on the three vertical dots

- From the menu that appears, click on Settings

- On the left-hand side of the settings page, click on Privacy and security

- In the Privacy and security section, click Site Settings

- Scroll down to the Permissions section, and click on Notifications

- Under the Default Behavior heading in the Notifications section, I suggest choosing Don’t allow sites to send notifications. (But only if you are sure you don’t wish to receive any). You can do this by clicking on the circle to the left of the option.

- The next thing to do is to take a look at the sites you have allowed and decide which ones you no longer require. You can find these sites under the Allowed to send notifications heading.

- You can block sites by clicking the three vertical dots and selecting Block. The site will now appear under the Not allowed to send notifications heading. While it is possible to use Remove, I would suggest Block to ensure notifications can’t happen again in the future.

Wrapping up
Chrome notifications may have been a good idea in the brains of the engineers at Google. However, for most of us, they are plain frustrating and allow scammers another way to get you to part with your money or your details.
As I also see no real benefit in even the legitimate notices, I would suggest blocking them all as described above.

